Add metadata to your book pages#

Metadata is information about a book or its content. It is often used to control the behavior of Jupyter Book and its features. This is a short guide to how metadata is added to various kinds of content in Jupyter Book.

Add metadata to notebooks#

You can control the behaviour of Jupyter Book by putting custom tags in the metadata of your cells. This allows you to do things like automatically hide code cells as well as add interactive widgets to cells.

Adding tags using notebook interfaces#

There are two straightforward ways to add metadata to cells:

  1. Use the Jupyter Notebook cell tag editor. The Jupyter Notebook ships with a cell tag editor by default. This lets you add cell tags to each cell quickly.

    To enable the cell tag editor, click View -> Cell Toolbar -> Tags. This will enable the tags UI. Here’s what the menu looks like.

    ../_images/tags_notebook.png

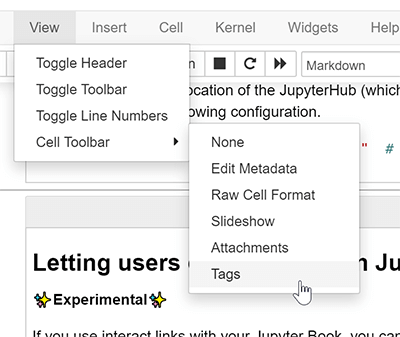
    Fig. 8 The Jupyter Notebook interface for adding tags to a cell.#

  2. Use the JupyterLab Cell Tags plugin. JupyterLab is an IDE-like Jupyter environment that runs in your browser. It has a “cell tags” plugin built-in, which exposes a user interface that lets you quickly insert cell tags.

    Edit tags under the “Property Inspector” menu with the gears icon () at the top-right corner. Here’s what the tags UI in JupyterLab looks like.

    ../_images/tags_jupyterlab.jpg

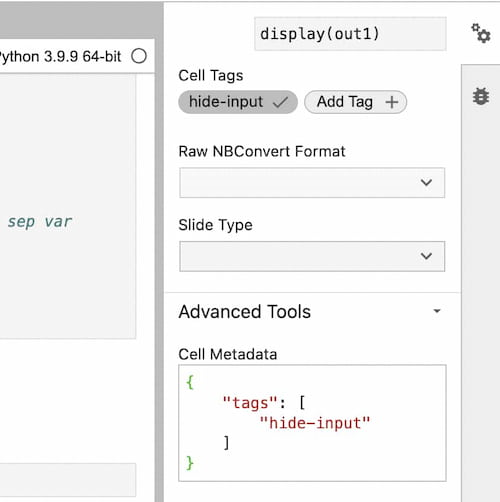
    Fig. 9 The Jupyter Lab interface for adding tags to a cell.#

Tags are actually just a special section of cell level metadata. There are three levels of metadata:

  • For notebook level: in the Jupyter Notebook Toolbar go to Edit -> Edit Notebook Metadata

  • For cell level: in the Jupyter Notebook Toolbar go to View -> Cell Toolbar -> Edit Metadata and a button will appear above each cell.

  • For output level: using e.g. IPython.display.display(obj,metadata={"tags": []), you can set metadata specific to a certain output (but Jupyter Book does not utilize this just yet).

../_images/metadata_edit.png

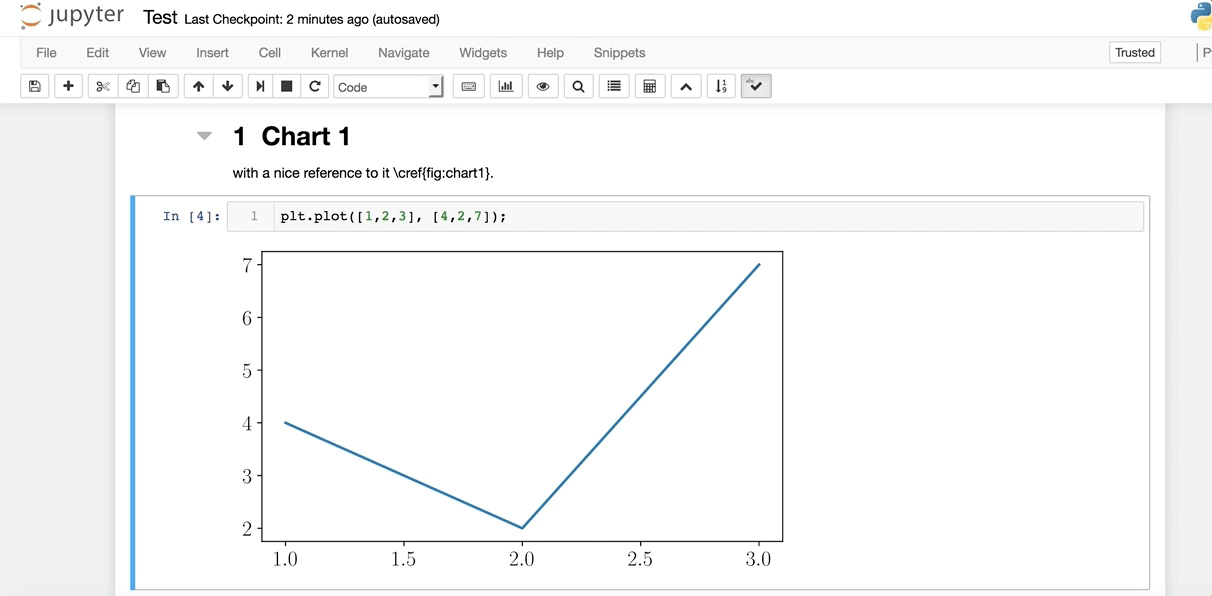
Fig. 10 Toggling the cell metadata UI in the Jupyter Notebook Interface.#

Add tags using MyST Markdown notebooks#

If you’re writing notebooks with MyST Markdown, then you can add tags to each code cell when you write the {code-cell} block. For example, below we:

```{code-cell}
:tags: [tag1,tag2,tag3]
print("some code")
```

Will create a code cell with those three tags attached to it. For more information about MyST Markdown notebooks, see Notebooks written entirely in Markdown.

Add tags using Python code#

Sometimes you’d like to quickly scan through a notebook’s cells in order to add tags based on the content of the cell. For example, you might want to hide any cell with an import statement in it using the remove-input tag.

Here’s a short Python snippet to accomplish something close to this. First change directories into the root of your book folder, and then run the script below as a Python script or within a Jupyter Notebook (modifying as necessary for your use case). Finally, check the changes that will be made and commit them to your repository.

import nbformat as nbf
from glob import glob

# Collect a list of all notebooks in the content folder
notebooks = glob("./content/**/*.ipynb", recursive=True)

# Text to look for in adding tags
text_search_dict = {
    "# HIDDEN": "remove-cell",  # Remove the whole cell
    "# NO CODE": "remove-input",  # Remove only the input
    "# HIDE CODE": "hide-input"  # Hide the input w/ a button to show
}

# Search through each notebook and look for the text, add a tag if necessary
for ipath in notebooks:
    ntbk = nbf.read(ipath, nbf.NO_CONVERT)

    for cell in ntbk.cells:
        cell_tags = cell.get('metadata', {}).get('tags', [])
        for key, val in text_search_dict.items():
            if key in cell['source']:
                if val not in cell_tags:
                    cell_tags.append(val)
        if len(cell_tags) > 0:
            cell['metadata']['tags'] = cell_tags

    nbf.write(ntbk, ipath)